Modo can create beautifully rendered images of Lego with just the default lighting setup


Previously I'd spent quite a bit of time writing command line scripts for POV-Ray to render LDRAW models. Using a combination of Python and other tools I can directly access all the features of POV-Ray (well, the ones that I understand!) via a scripting interface. Scripting allows me to rapidly create multiple rendered views of a model so that I can quickly see how the lighting and rendering effects different parts of the model in question. I used Lars Hassings lovely little utility L3P (http://www.hassings.dk/l3/l3p.html) to frame the model for subsequent POV-Ray renders. Part of a simple POV-Ray scripted turnaround is featured in the images below.


Previously I'd spent quite a bit of time writing command line scripts for POV-Ray to render LDRAW models. Using a combination of Python and other tools I can directly access all the features of POV-Ray (well, the ones that I understand!) via a scripting interface. Scripting allows me to rapidly create multiple rendered views of a model so that I can quickly see how the lighting and rendering effects different parts of the model in question. I used Lars Hassings lovely little utility L3P (http://www.hassings.dk/l3/l3p.html) to frame the model for subsequent POV-Ray renders. Part of a simple POV-Ray scripted turnaround is featured in the images below.


MODO also has a command line interface (modo_cl.exe - modo command line) so the ability to script the output of MODO seemed a distinct possibility - the reality turned out to be a lot more complex!
MODO does have a complete command line interface but picking my way through various documents, snippets and scripts available online was hard work, and it often seemed that the complex things were easy and the easy stuff was complex! For a number of reasons I wanted to script the complete pipeline from LDR file to rendered image, so put simply, initially I needed to...
Import an LDR file
Frame the camera on the model
Render the image
Save the rendered image to disk
Save the resulting file as a native MODO file
From the command line MODO has a medley of scene, layers, items and other functions to control and manipulate. When you only have a 30 day trial to figure it all out it can seem overwhelming.
MODO's command line can be accessed from the command line version of MODO and it needs to be run in an administrative cmd window and typing the following...
"C:\Program Files\Foundry\Modo\11.2v2\modo_cl.exe"
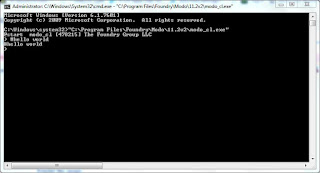
Obviously I'm on Windows here but the principles should be the same for Linux and Mac. However MODO_CL also needs to know about the LDRAW plugin that hopefully you've already installed for the GUI version of MODO - to do this you need to load a config file when you launch MODO_CL so you need to type
"C:\Program Files\Foundry\Modo\11.2v2\modo_cl.exe" -config C:\Users\Neil\AppData\Roaming\Luxology\MODO11.2.CFG
I'm loading the GUI version of MODO's config file (as this config file should know about the LDRAW plugin - assuming you've installed it correctly)

Note that when MODO_CL starts up now it reports "Ldraw plugin done". This should now allow you to load LDraw ldr files (BUT I had to copy an LDRAW folder to C:\LDraw as this seemed to be the only place MODO_CL would look for the LDRAW files - irrespective of what you have set for your LDRAW location in the GUI version of MODO)
Now you can start to type commands directly into MODO_CL - so this would load my lighthouse2 ldr file...
scene.open "C:\Users\Neil\Google Drive\modoscript\lighthouse2.ldr"

MODO supports a number of scripting languages including python, perl and lua, however initially I just wanted to execute commands directly in the MODO_CL interface as I didn't want to get bogged down having to fend off errors both from the programming language and MODO_CL - if I just executed commands directly in the MODO command line interface then I knew that I would only have to deal with MODO_CL errors.
You can combine your MODO_CL commands into a simple text file then get MODO_CL to execute each line in the text file in turn - this is a lot easier than having to type each line into MODO_CL individually.
You can load the text file into MODO_CL using the following command
#"C:\Program Files\Foundry\Modo\11.2v2\modo_cl.exe" -config C:\Users\Neil\AppData\Roaming\Luxology\MODO11.2.CFG < "C:\Users\Neil\Google Drive\modoscript\modo_cl_script.txt"
where modo_cl_script.txt is the name of your script file.
So below is my script to
Open a LDR file,
Frame the model in camera (manually)
Save the file as a MODO native lxo file
Open the lxo file you've just saved
Render the image from the MODO lxo file
I've also included a number of other commands that I tried along the way, discovering that a number of them didn't work in MODO_CL - or though MODO_CL happily tells you that it's executed the command!
#Make sure LDRAW Plugin for Modo is installed
#Currently an LDRAW folder needs to be in C:\LDRAW Modo_CL does not see the LDRAW location set for the plugin in Modo
#But you still need to load the config file so that Modo_CL knows where the LDRAW plug-in is
#CMD LINE...
#"C:\Program Files\Foundry\Modo\11.2v2\modo_cl.exe" -config C:\Users\Neil\AppData\Roaming\Luxology\MODO11.2.CFG < "C:\Users\Neil\Google Drive\modoscript\modoscript04.txt"
#Lots of people have this in their scripts!
log.toConsole true
log.toConsoleRolling true
#Open LDR File
scene.open "C:\Users\Neil\Google Drive\modoscript\lighthouse2.ldr"
#Create a sphere using a built in MODO macro (for testing)
#@"Unit Sphere"
#If you want to directly position the camera in the scene you can use this command (but the numbers x,y,z rotx,roty, rotz will be different for your model!
query sceneservice camera.name ? 0
camera.transformTo Camera -0 0.045 0.280 0 0 0
#If you want to call a seperate python script you can use this - although calling scripts can be tempremental and they may need to live in a specific folder
#script.implicit "C:\Users\Neil\AppData\Roaming\Luxology\modo_helloworld.py"
#========= Select Items ==========
select.subItem A001dat set mesh;meshInst;camera;light;txtrLocator;backdrop;groupLocator;replicator;surfGen;locator;deform;locdeform;deformGroup;deformMDD2;ABCStreamingDeformer;morphDeform;itemInfluence;genInfluence;deform.push;deform.wrap;softLag;ABCCurvesDeform.sample;ABCdeform.sample;force.root;baseVolume;chanModify;itemModify;meshoperation;chanEffect;defaultShader;defaultShader 0 0
#========= Fit in Viewport ==========
# The tools that you can use in the MODO interface to frame objects do NOT seem to work in the command line - I've included them here for reference
# Select the camera...
#select.subItem camera040 set mesh;meshInst;camera;light;txtrLocator;backdrop;groupLocator;replicator;surfGen;locator;deform;locdeform;deformGroup;deformMDD2;ABCStreamingDeformer;morphDeform;itemInfluence;genInfluence;deform.push;deform.wrap;softLag;ABCCurvesDeform.sample;ABCdeform.sample;force.root;baseVolume;chanModify;itemModify;meshoperation;chanEffect;defaultShader;defaultShader 0 0
#========= NONE OF THE LINES IN THIS SECTION SEEMS TO WORK IN MODO_CL ==========
#viewport.fitSelected
#camera.fit true true
#camera.syncView
#render.syncView
#========= Save Scene ==========
!scene.saveAs "C:\Users\Neil\Google Drive\modoscript\Lighthouse_saveV01.lxo" $LXOB
#========= If you want to exit the script (before rendering) uncomment the next line ==========
#app.quit
#========= Open scene ==========
# Open the scene you've just saved
scene.open "C:\Users\Neil\Google Drive\modoscript\Lighthouse_saveV01.lxo"
pref.value render.threads auto
#========= Target Camera ==========
#This sort of works but I have not yet worked out how to frame the camera nicely around the model
#select.subItem camera set mesh;meshInst;camera;light;txtrLocator;backdrop;groupLocator;replicator;surfGen;locator;deform;locdeform;deformGroup;deformMDD2;ABCStreamingDeformer;morphDeform;itemInfluence;genInfluence;deform.push;deform.wrap;softLag;ABCCurvesDeform.sample;ABCdeform.sample;force.root;baseVolume;chanModify;itemModify;meshoperation;chanEffect;defaultShader;defaultShader 0 0
#select.subItem mesh001 add mesh;meshInst;camera;light;txtrLocator;backdrop;groupLocator;replicator;surfGen;locator;deform;locdeform;deformGroup;deformMDD2;ABCStreamingDeformer;morphDeform;itemInfluence;genInfluence;deform.push;deform.wrap;softLag;ABCCurvesDeform.sample;ABCdeform.sample;force.root;baseVolume;chanModify;itemModify;meshoperation;chanEffect;defaultShader;defaultShader 0 0
#target set
#========= Or you can move the camera directly after you open the file so frames the object ==========
#camera.transformTo camera -0 0.055 0.090 0 0 0
#========= Start Render ==========
select.Item Render
item.channel step 1
item.channel first 1
item.channel last 1
item.channel outPat "_<FFFF>"
render.res 0 480
render.res 1 270
render.animation "C:\Users\Neil\Google Drive\modoscript\ModoLighthouseScriptRender_v01" PNG
#WORKS!
So what do I get when I run this script...

...the back of my model...doh...more work to do...!
No comments:
Post a Comment