Thursday, 17 October 2024

Instructions For Building The Lego Cray-1 Supercomputer

 A number of people have requested instructions to build their own version of a Lego Cray-1 Supercomputer - As a result I've published them here (as a pdf) - The original Cray-1 was modular in it's design and configuration and the instructions are for one "module" of the Cray-1 and I think 8 of the "modules" should give you a complete Cray "Ring"

The full instructions can be downloaded here (pdf 3.5Mb) 


Lego Cray-1 Installed at The National Museum of Computing (UK)

 A version of the Lego Cray-1 model was installed earlier this year at The National Museum Of Computing which is located at the iconic Bletchley Park site near Milton Keynes here in the UK.  Bletchley Park is famous for the code breaking endeavours of Alan Turing and his team during World War II.  As well as having it's own Cray-1 Supercomputer on site, the The National Museum Of Computing has many fascinating computing exhibits and is well worth a visit.


Sunday, 28 January 2024

Building a Lego Supercomputer - The Cray-1 - Part 7

 Finally it was time to put the model on Lego Ideas - you can see it here:

https://ideas.lego.com/projects/4a1111de-55fd-4236-9990-0b4e0cc599d1

Please support it if you can and share it with your friends and family


Monday, 15 January 2024

Building a Lego Supercomputer - The Cray-1 - Part 6

Having got the basic Lego design to more accurately reflect the the layout of the Cray-1 it was now possible to focus on colouring up the design and rendering the images


Some of the initial renders are below


Sunday, 7 January 2024

Building a Lego Supercomputer - The Cray-1 - Part 5

The image below shows an early redesign featuring a new seat height and an "additional" tower between the two existing towers - to create more of the cylindrical outer shape of the Cray-1 towers 


With the revised hinge construction under the seat to place the base of the "middle" tower

It was this basic design would become the basis of the final model for each of the "Cray-1 Lego Units" - the base and now the two towers - that would be used in the Lego Cray-1 Supercomputer - in theory duplicating each of the "Cray-1 Lego Units" should create the the classic cylindrical design.


Sunday, 3 December 2023

Building a Lego Supercomputer - The Cray-1 - Part 4

As I read more about the history of the Cray-1 and some of those involved in the design and manufacture of these intricate devices, I'd also started to think more about how to represent the inside of the Cray-1 Supercomputer.  Having some ability to view the insides of the towers also needed to be considered.


However as I spent more time working on these early designs I realised there were a couple of problems.  The first one was the that the seat height wasn't correct for the scale of the towers - this was relatively easy to fix.  The second problem was much more challenging - the shape of the towers in the Cray-1 form, in effect, an unbroken cylinder.  My towers had a large gap between the outer edge of each tower.  In order to solve this problem I would have to return to the drawing board to redesign both the seat and the construction of the the towers.


Saturday, 4 November 2023

Building a Lego Super Computer - The Cray-1 - Part 3

 A better understanding of the angles of rotation for each "Cray-1 Lego Unit" (the seat and the tower) led to a better Lego representation of the Cray-1 Supercomputer.


Rendering some of these early designs began to look more like the classic shape of the Cray-1 Supercomputer


Sunday, 1 October 2023

Building a Lego Supercomputer - The Cray-1 - Part 2

 If there was one site that inspired me whilst I was thinking about building a Lego model of the Cray-1 Supercomputer it was this one

https://cray-history.net/cray-history-front/fom-home/fom-cray-1/

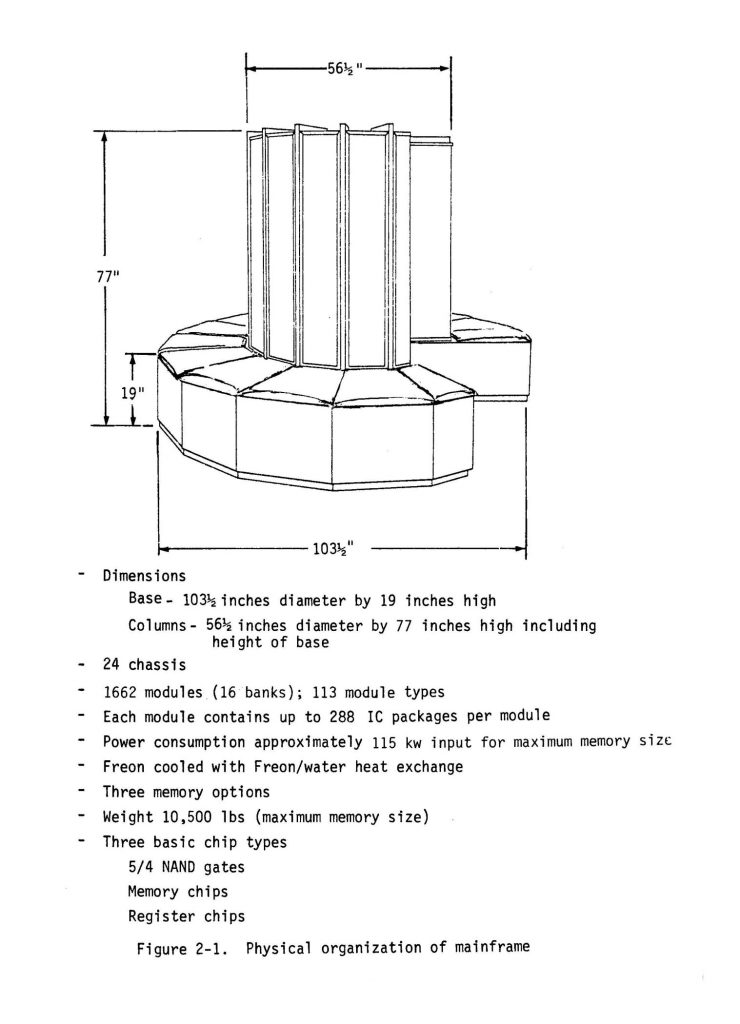
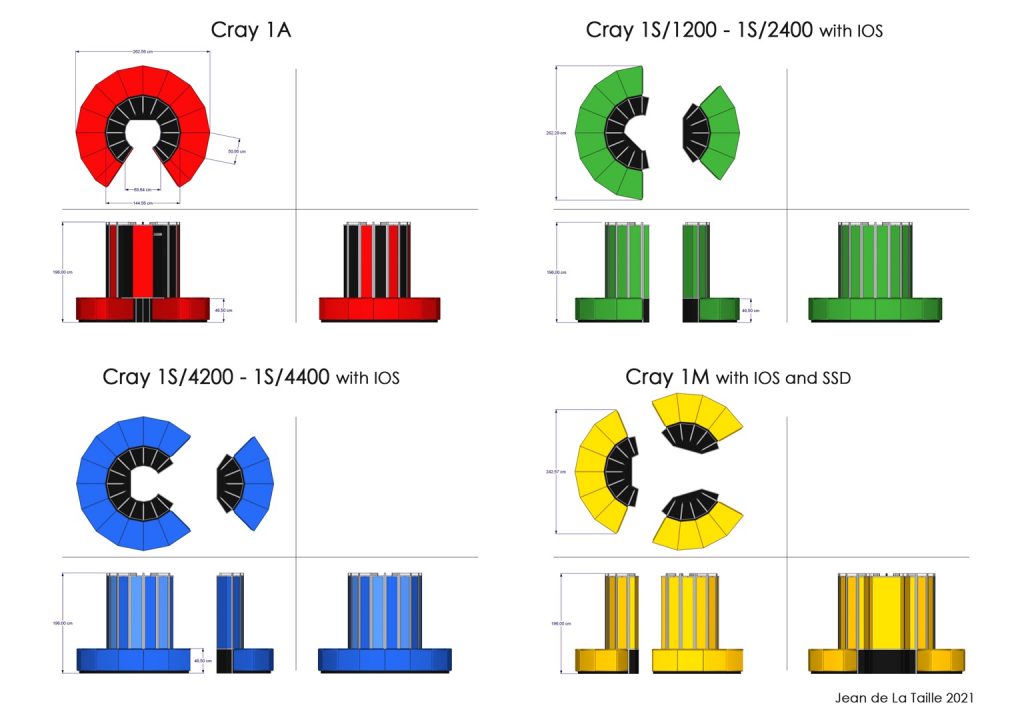
The detailed diagrams and photos were invaluable when I was looking at how best to represent a Cray-1 in Lego.  Some of the images, from the website show the schematic diagrams for the Cray-1, seen below

These diagrams would prove invaluable when I was trying to work out the best angles for rotating each "Cray-1 Lego Unit" (the tower and seat) - And as this image below shows - it's very easy to get the angle of rotation wrong for each "Cray-1 Lego Unit" and end up creating some kind of Cray-1 auditorium!


Saturday, 16 September 2023

Building a Lego Supercomputer - The Cray-1 - Part 1

Having worked in computing and technology for over 30 years, I've noticed that some names come up more often in computing history than others.  One of those names is Cray.  Cray Research Inc was originally founded in 1972 by Seymour Cray, but it was the probably the creation of the Cray1 Supercomputer in 1976 that caused the Cray name to become part of computing history.

Image of Cray-1 In the Science Museum London - From Wikipedia - https://en.wikipedia.org/wiki/Cray-1

I'd been looking at smooth sided cylindrical and conical Lego models for a while now - Smooth sided cylindrical Lego models are quite difficult to get right - The Lego Saturn V model is a great example of when it works well.   And smooth sided conical models I've found even more difficult!  So building a
Cray-1 with it's cylindrical towers and seating seemed like a good fit for a new Lego model build.

Building an initial representation of single "Cray-1 Unit" ie. the seat and tower, was relatively straight-forward


However I quickly realised that the remainder of the model would not be that easy!

Sunday, 20 November 2022

Going back to Lego Digital Designer

 For complicated reasons I decided to rebuild my model of The Pantiles in Tunbridge Wells using LDD - it's been a while since I used LDD and I'd forgotten how exacting it was with regards brick placement (which I suppose should only be expected really)


Rendering still leaves a bit to be desired - I did eventually manage to download a copy of BlueRender the java based rendering tool for LDD which allowed me to make this image


and turnaround animation


Wednesday, 5 October 2022

Animating In Blender (Part 4)

 Finally I added in a brick stack that our little robot friend could knock over (using Blender physics!)


All the sound effects were also added in Blender and sync'd up using the compositing tool


Thursday, 8 September 2022

Animating In Blender (Part 3)

Having spent a bit of time with playing with both Blender physics and drivers, I started to think about combining all the elements into a short sequence.  I wanted to create a character and an animation that combined all the elements I'd been looking at - I designed the initial character in LDCad and then imported it into Blender.


I knew how important the eyes were going to be, so I used three different circular round eye tiles that I planed to animate between  in Blender, to create a blink (there are other tools available for animating minifigure rigs and expressions in Blender including EpicFigRig https://github.com/BlenderBricks/EpicFigRig) - but I wanted to keep it simple!


Saturday, 6 August 2022

Animating In Blender (Part 2)

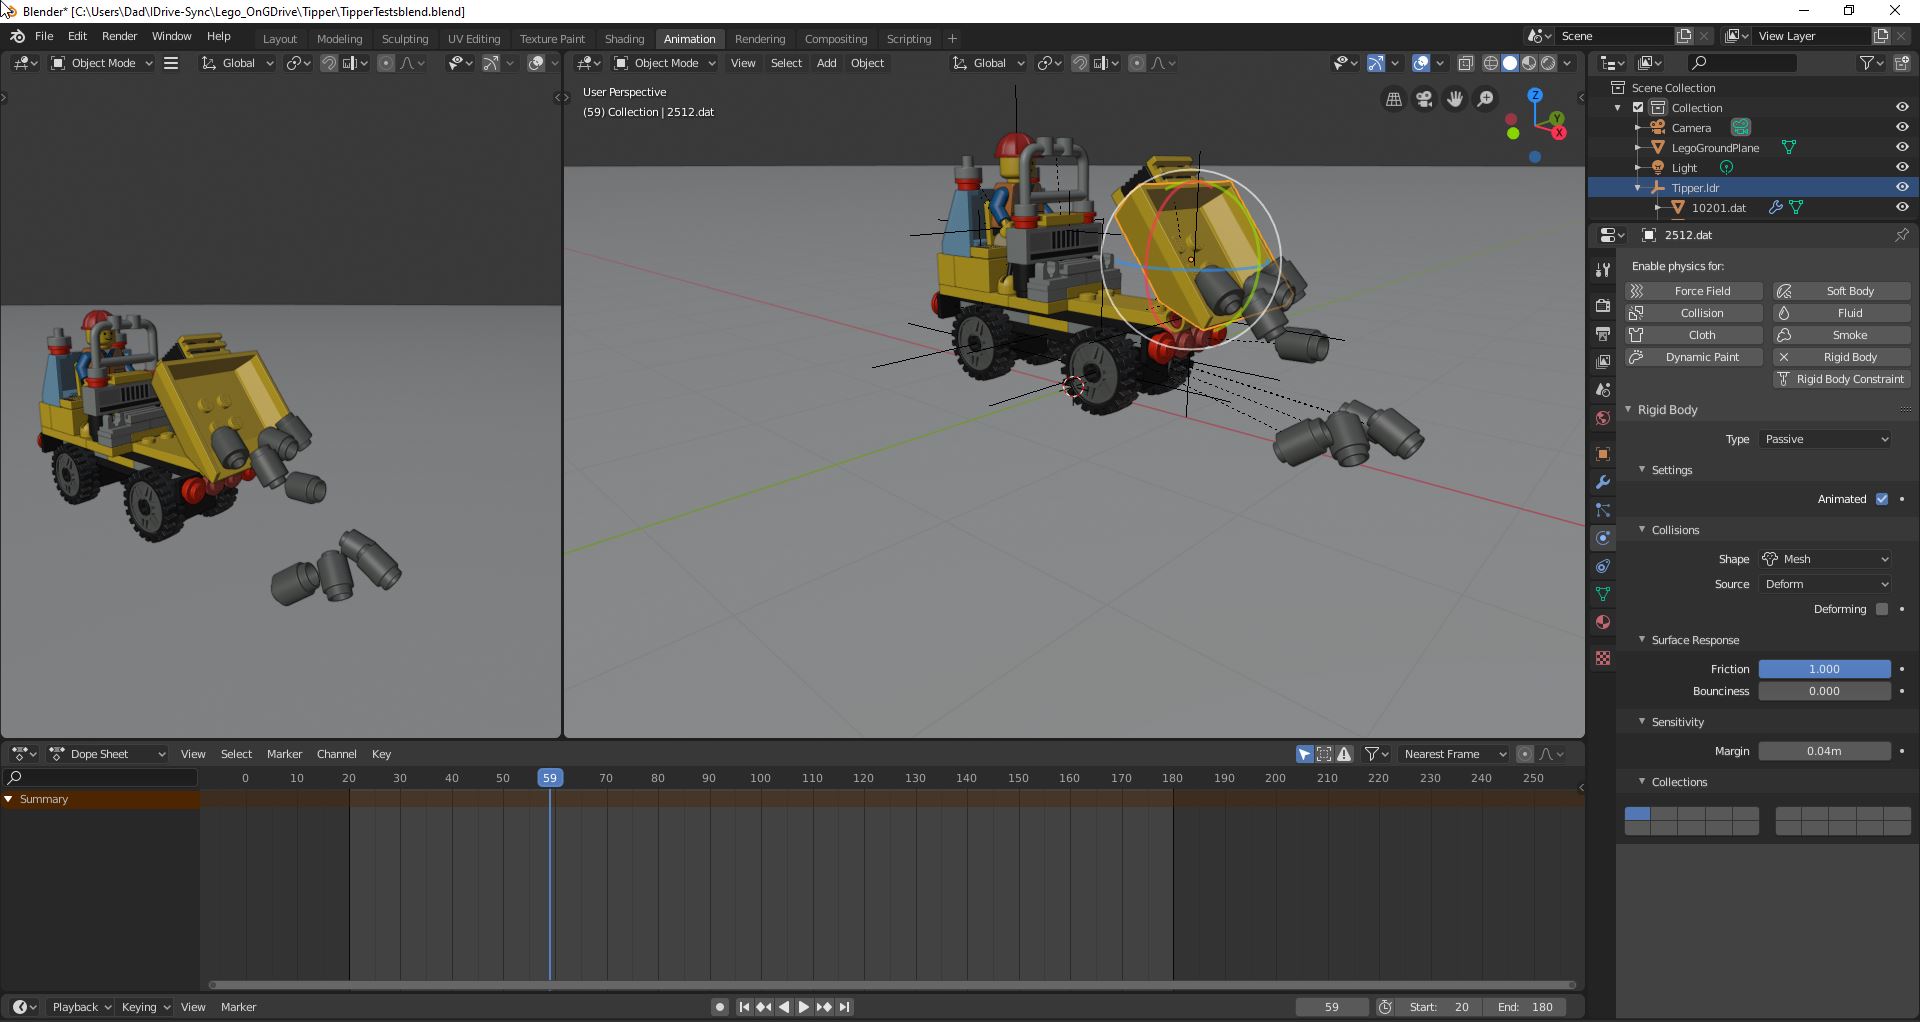
 As well as being fairly easy to animate vehicle wheels based on the movement of an object I also wanted to look at how it easy it is to use Blender's physics engine


  This animation was created using Blender's rigid body physics - also was a lot easier than I expected


I speed watched a few of YouTube videos before and during the processhttps://www.youtube.com/watch?v=9lDY5YN3SEA
https://www.youtube.com/watch?v=B58P5hnbdNU
https://www.youtube.com/watch?v=lctjzasiy64The whole process took about 8 hours to build/animate and render (and I've never animated anything in Blender previously) - Understanding the basic Blender animation process took about 4-6 hours - getting the physics "right" for Lego took a couple more hours (and it's still not perfect) - rendering another hour.  But it was actually a lot easier than I expected

Sunday, 3 July 2022

Animating In Blender (Part 1)

I found myself with a bit of time last weekend and as I wasn't that happy with the decals that I used in both LDCAD and Studio on my last model, so I thought I would go back to looking at Blender for rendering (as opposed to Studio).  I'm fairly sure I could stick image decals on models in Blender so rather than flog that particular dead horse, I thought I would have a look at some animation in Blender instead and see if I could render something in Blender - I created this little mov - the model was built in LDCAD (but you could use Studio) and imported into Blender using the Blender LDRAW plugin.


 I guess I spent about a day trying to figure out the basic tools and controls for parenting and basic animation - I haven't used a rig here - just basic parentiing.

The only animation here is really the way the wheels turn when you move the model (and the minifig head goes round too!) - and I used this YouTube video to help me to animate the wheels

https://www.youtube.com/watch?v=kD1MoN3wPiM

But all in all it was a lot easier than I expected


Saturday, 4 June 2022

The Chalybeate Spring - The Pantiles (Part 6)

I added The Chalybeate Spring - The Pantiles - Royal Tunbridge Wells to Lego Ideas and it generated some interest in the local papers


I hadn't actually realised that you could no longer place text on images for the Lego Idea website so all my original images (like the one above) were rejected.  However, thankfully Lego Ideas still allow for custom decals on the submitted models.


Saturday, 7 May 2022

The Chalybeate Spring - The Pantiles (Part 5)

Having finally cleaned up all the text on my Chalybeate Spring model - I was ready to apply on the text decals to the models.  One of the problems with using svg2ldraw is that it creates a seperate .dat file which then has to be positioned in front of the relevant brick.  This requires sub brick manipulation and it can be hard to see the actual absolute placement of the sticker until the final render - one of the issues I had was that the stickers can seem to sit slightly proud of the brick, but this only really becomes apparent once you render the final images.  


Saturday, 9 April 2022

The Chalybeate Spring - The Pantiles (Part 4)

There are a number of tools for creating decals for ldr files.  

http://www.melkert.net/test/stickerGen.html

https://github.com/nilsschmidt1337/ldparteditor/wiki

http://www.scottwardlaw.com/sticker_generator/

But I struggled to find one that would allow for seamless transfer of stickers between LDCAD, Studio, and Blender.  Consequenly I ended up using svg2ldraw

http://c-mt.dk/software/svg2ldraw/

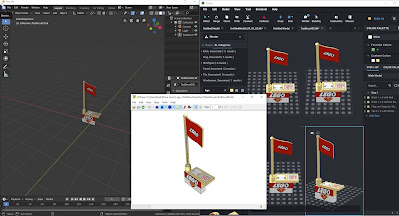
For me svg2ldraw works well but it requires a fairly detailed understanding of vector graphics.  I was using an old copy of Illustrator CS2(!) to manipulate the original vector artwork (but Inkscape may also work).  svg2ldraw allows you to remap colours into Lego colours (including transparency) which allows for separation of colour elements from the background when placing the sticker in Ldraw.  The image below shows the original design in Illustrator, the sticker in LDraw and the final render in Studio.


Although the construction of a logo is relatively straight forward (although it still took me a few hours to figure out!) dealing with large blocks text turned out to be a lot more complicated.  


Unfortunately the svg2ldraw converter does not seem to read compound paths in the same way as Illustrator so all the compound paths need to be converted to simple paths - this can be especially tricky when working with letters with any "holes" in them (like O P B A R D etc) which will be converted to compound paths in Illustrator - each of the "holes" will need cleaning up separately - which can take a lot of time!.


Friday, 4 March 2022

The Chalybeate Spring - The Pantiles (Part 3)

Stickers, as it turns out, remain complex and time consuming in LDRAW - in the past I’ve used image files which you can embed (as a reference link to the image file) in the LDRAW dat file - these can be useful when working with image reference planes in LDCAD - however it turns out neither Studio nor Blender could read these images files when they are linked in a .dat file - Now I realise, of course, that I could add all the stickers and decals directly in Blender once the LDRAW model brick elements were complete (and I might do next time!). However I wanted to find the solution that allowed LDRAW models to move seamlessly between LDCAD, Studio and Blender - as many LDRAW parts have stickers and decals on them that appear in all packages there is clearly a solution. 


Wednesday, 16 February 2022

The Chalybeate Spring - The Pantiles (Part 2)

The last build I did with custom stickers celebrated Will Bayley’s Paralympic gold medal victory back in 2016 - I’d built the model of Will’s celebration antics in Lego Digital Designer and the stickers and decals were created using numerous guides and tips from the internet. I remember it was a complicated process! This time I was building using LDRAW components in LDCAD and I planned to render in Studio (‘’cos it’s relatively easy to get a nice rendered image out!). I still much prefer to build in LDCAD as opposed to Studio so I needed to make sure that any stickers I created would transfer between LDCAD and Studio - as I discovered it still isn’t easy to make easily transferable stickers in LDRAW!


Sunday, 30 January 2022

The Chalybeate Spring - The Pantiles (Part 1)

 I’ve been working on a new architectural model for a couple of months and I wanted to create the stickers for a number of elements. The model is based on the Chalybeate Spring part of The Pantiles, an historic street in Tunbridge Wells - The initial build took a couple of weeks and I created everything initially just using white bricks. The next step would be to add all the stickers - this would turn out to be a lot more complicated than I imagined!